Table of Contents
- Why Cleaning Refrigerator Coils Matters
- Signs of Dirty Refrigerator Coils
- How Often to Clean Fridge Coils
- Tools and Safety Precautions You’ll Need
- Locating Your Refrigerator Condenser Coils
- Step-by-Step Cleaning Process
- Best Practices With a Refrigerator Coil Cleaning Brush
- Post-Cleaning Maintenance and Energy Savings
- Frequently Asked Questions
Last Updated: September 23, 2026
Why Cleaning Refrigerator Coils Matters
Your refrigerator pulls heat from inside and pushes it outside through condenser coils. When dust and pet hair block those coils, the fridge can’t release heat properly. Learning how to clean refrigerator coils prevents this problem. The compressor runs longer and harder, your electric bill climbs, food spoils faster, and eventually the whole system fails.
Cleaning refrigerator coils takes 20 to 30 minutes with just a vacuum and brush, yet most homeowners skip it until something breaks.
This guide shows you how to clean refrigerator coils yourself.
The biggest mistake homeowners make is waiting until their fridge stops cooling to clean the coils. By then, the compressor is already strained and may need replacement. Clean them every 6 to 12 months before problems start.
Signs of Dirty Refrigerator Coils
Dirty condenser coils send clear warning signs before a complete breakdown happens.
Your fridge runs constantly. If the compressor hums nearly all the time instead of cycling on and off, the coils are probably clogged.
The fridge feels warm inside. Food doesn’t stay as cold as it should, and the temperature creeps up even though the dial hasn’t changed.
You hear unusual noises. Listen for grinding, clicking, or rattling sounds that indicate the motor is working overtime.
The unit feels hot to the touch. If it’s hot enough to pull your hand away, heat isn’t escaping properly.
Frost builds up inside the freezer. When coils can’t release heat, moisture condenses and freezes inside the cabinet. You’ll see ice buildup on walls or shelves.
Ignoring these signs leads to compressor failure. Cleaning the coils costs nothing but your time.
How Often to Clean Fridge Coils
Most homes benefit from cleaning every 6 to 12 months, though pet owners and dusty environments need more frequent attention.
Pet owners: Clean coils every 3 to 6 months. Pet hair and dander cling to coils faster than anything else and block airflow quickly.
Homes with no pets: Clean every 6 to 12 months.
High-dust environments: If you live near construction, have a wood-burning stove, or live on a dusty road, clean every 3 to 6 months.
New appliances: Check the coils after 3 months, as some units shed manufacturing debris.
Check your coils every 3 months and clean if dust has accumulated. This prevents breakdowns and keeps your fridge running efficiently.
Tools and Safety Precautions You’ll Need
Essential Cleaning Supplies
Vacuum with attachments. Use the crevice tool to reach between coils and the brush attachment to loosen dust.
Coil brush. A thin, flat brush designed to fit between coil fins ($10-$20). This is the most important tool because it dislodges dust that a vacuum alone can’t reach.
Soft cloth or old towels. Use these to wipe away loose dust before and after cleaning.
Flashlight or headlamp. Coils are often in dark spaces, so a light helps you see what you’re doing.
Safety First: Unplugging and Preparation
Unplug the unit. Pull the plug from the wall outlet. Don’t rely on turning it off with a button, as the compressor still carries electrical current when powered on.
Let it sit for 5 minutes. This allows residual electrical charge to dissipate and the compressor to cool.
Clear the area. Move anything blocking access to the coils and pull the fridge forward if needed.
Wear gloves if you prefer. Coil fins are sharp and can cut your fingers. They’re optional but recommended.
Unplugging the refrigerator before cleaning is non-negotiable. It’s the difference between a safe maintenance task and a dangerous one.
Locating Your Refrigerator Condenser Coils
Condenser coils aren’t always in the same place. Different fridge designs hide them in different spots. Once you know where to look, you’ll find them easily.
Coil Location Variations by Fridge Type
Bottom-mounted coils (most common). Remove the base grille at the front to access the coils directly.
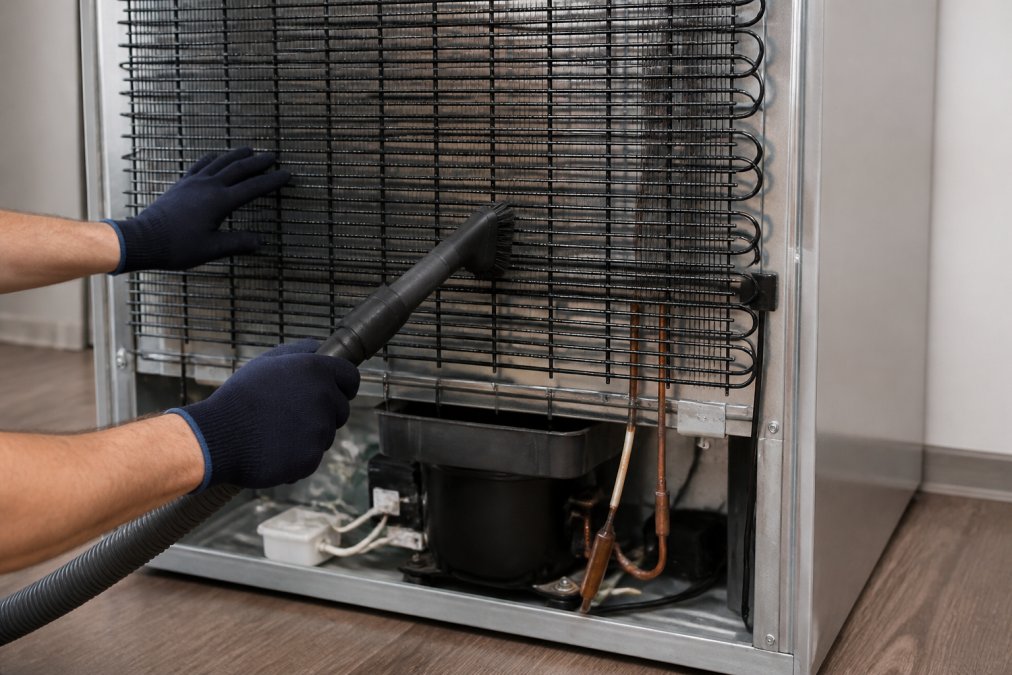
Back-mounted coils. Pull the fridge away from the wall to reach the coils on the back panel.
BOOK YOUR SERVICE REPAIR TODAY →
Side-mounted coils. Some side-by-side refrigerators have coils running vertically along one side. These are less common but follow the same cleaning principles as bottom coils.
Integrated coils. Newer models sometimes integrate coils into the cabinet itself. If you can’t find obvious coils underneath or behind, check your owner’s manual. It will show the exact location for your specific model.
Where to find your manual. Your refrigerator’s model number is usually on a sticker inside the fridge or on the back. Search online for “[Brand] [Model Number] manual.” The manual shows coil location and includes a diagram. Manufacturers’ websites often have PDFs available for free download.
Step-by-Step Cleaning Process
Removing the Base Grille
Most bottom-mounted coils sit behind a removable grille at the front of the fridge. Removing it takes 30 seconds.
Locate the grille. Look at the very bottom front of your refrigerator. You’ll see a horizontal panel that runs the width of the unit. This is the base grille.
Find the clips or screws. The grille is held in place by clips or small screws. Clips are more common. They’re usually on the left and right sides. Press inward on the clips and the grille slides out toward you.
Slide it out carefully. Pull the grille straight toward you. It should slide out smoothly. Don’t force it. If it’s stuck, check that both clips are released.
Set it aside. Place the grille on a clean surface. You’ll reinstall it after cleaning.

Vacuuming vs. Brushing Techniques
Both tools work together. Vacuum first, then brush, then vacuum again. This three-step approach removes the most dust.
Start with the vacuum. Attach the crevice tool to your vacuum. Run it along the coils in a slow, steady motion. Don’t rush. Let the suction do the work. Vacuum from left to right, then top to bottom. Cover the entire coil surface.
Use the brush next. Take your refrigerator coil cleaning brush and gently scrub between the coil fins. Use short, deliberate strokes. The brush dislodges dust that the vacuum alone couldn’t reach. Brush in the same pattern: left to right, top to bottom.
Vacuum a second time. After brushing, vacuum again to catch all the loosened dust. The brush stirs up particles that settle on the coils. A final vacuum pass removes them.
Check your progress. Shine your flashlight on the coils. They should look noticeably cleaner. Dust should be minimal. If heavy dust remains, repeat the brush-and-vacuum cycle once more.
Handling Pet Hair and Dander Buildup
Pet hair requires extra attention. It tangles around coil fins and doesn’t come loose easily with a vacuum alone.
Use the brush aggressively on pet hair. Don’t be gentle. Push the brush between the fins with firm, deliberate pressure. Pet hair wraps around the fins, and light brushing won’t free it. The brush needs to work against the tangled hair to break it loose.
Make multiple passes. One pass isn’t enough. Brush the same area three or four times. Each pass removes more hair. You’ll see loose hair accumulating on the floor or in your vacuum.
Vacuum between brush passes. After every two or three brush strokes, vacuum. This removes the loosened hair before it falls back onto the coils. It also prevents hair from clogging your vacuum.
Consider compressed air for stubborn spots. If pet hair is deeply embedded, a short burst of compressed air can help dislodge it. Hold the can upright and use short bursts. Don’t hold it upside down. The liquid inside can damage coil fins.
Expect to spend extra time. Pet hair cleaning takes longer than dust removal. Budget 40 to 50 minutes if you have multiple pets. It’s worth the effort to prevent future buildup.
Pet hair is the most common reason for refrigerator coil failure. If you have pets, make coil cleaning a quarterly habit, not a yearly one.
Best Practices With a Refrigerator Coil Cleaning Brush
The coil brush is your most important tool. Using it correctly makes the difference between a quick clean and a thorough one.
Choose the right brush size. Coil brushes come in different widths. Measure the space between your coil fins.
Post-Cleaning Maintenance and Energy Savings
After you’ve cleaned the coils, your refrigerator will run more efficiently. But this efficiency won’t last if you don’t maintain the coils going forward.
Frequently Asked Questions
How do I know if my refrigerator coils are dirty?
Dirty refrigerator coils show several warning signs: your fridge runs longer than usual, the compressor cycles frequently, or the motor sounds louder. You may also notice the refrigerator isn’t cooling as well, or the back and sides of the unit feel unusually warm. Visible dust and debris on the coils themselves are the clearest indicator. If your fridge struggles to maintain temperature, dirty coils are often the culprit. A visual inspection after removing the base grille will confirm whether cleaning is needed.
How often should I clean my refrigerator coils?
Most manufacturers recommend cleaning refrigerator coils every 6 months, though this varies by household. Homes with pets, high dust levels, or heavy cooking activity may need cleaning every 3 to 4 months. If you have a single adult in a clean environment, annual cleaning may suffice. The key is monitoring your fridge’s performance: if cooling drops or energy consumption rises, clean the coils regardless of the schedule. Regular preventative maintenance prevents compressor strain and extends appliance longevity.
What tools do I need to clean refrigerator coils?
You’ll need a vacuum with a crevice tool attachment, a soft-bristled coil brush, a flashlight, and possibly a fin comb if coil fins are bent. A damp cloth helps wipe away remaining debris. Most importantly, unplug the refrigerator before starting work, this is a critical safety step. Avoid stiff brushes or high-pressure water, which can damage the delicate coil fins. A refrigerator coil cleaning brush is purpose-designed to reach between fins without causing damage, making it a worthwhile investment for regular maintenance.
What happens if I don’t clean my refrigerator coils?
Neglecting coil cleaning forces your compressor to work harder, consuming more energy and raising utility bills. Dust buildup restricts heat dissipation, causing the refrigerator to overheat and struggle to maintain proper temperature. Over time, the compressor can fail, requiring expensive repairs or replacement. Your food may spoil if cooling performance drops significantly. Regular cleaning prevents these issues, preserves food freshness, reduces energy consumption, and extends the life of your refrigeration system. Preventative maintenance is far cheaper than emergency repairs.
Leave a Reply